Background Subtraction for Detection and Tracking Example
In the following example with the sample video the movement should be detected frame by frame.
All the background subtraction parameters are in configs class, section Background subtraction
[1]:
from offlinemot.utils_ import resize
from offlinemot.background_subtraction import BG_subtractor
from offlinemot.config import configs

import numpy as np
import cv2
import os
Now the sample video should be read with a video reader object from Opencv library
[2]:
cfg = configs()

cap = cv2.VideoCapture(os.path.join(cfg.cwd,'model','sample.mp4'))
ret, bg = cap.read() # read the first frame
The first frame is considered the default background at the start, and is used to compare with the next frames in the video in order to detect the motion.
In the case where we want to start the movement detection at some later frame, rather than the first one. We could write
[3]:
frame_id = 1 # the frame that should we start from
cap.set(1, frame_id-1)
[3]:
True
Then we intilize the background subtarctor object
[4]:
BG_s = BG_subtractor(bg,config=cfg)
ret, frame = cap.read()
Main loop
Now everything are ready to start the background subtarction loop. The result will be shown in a new window
The video will keep running until you hit ESC or the video ends
[5]:
while ret:
    frame_id += 1

    I_com = BG_s.bg_substract(frame)

    cv2.imshow('fgmask', resize(I_com,0.2))

    #print(frame_id)
    k = cv2.waitKey(30) & 0xff
    if k == 27:
        break
    ret, frame = cap.read()

cap.release()
cv2.destroyAllWindows()
As it was shown, the result has some problems, The moving cyclists are detected but not perfectly. Additionally the trees and parts of the road are detected as moving objects.
A resonable step would be to filter the video from the small noisy objects by deleting the small blobs. we can test that using other method of the class, namely: get_big_objects
[6]:
cap = cv2.VideoCapture(os.path.join(cfg.cwd,'model','sample.mp4'))
ret, bg = cap.read() # read the first frame

BG_s = BG_subtractor(bg,config=cfg)
ret, frame = cap.read()
frame_id = 0

while ret:
    frame_id += 1

    I_com = BG_s.bg_substract(frame)
    # filter small objects
    I_com, _ = BG_s.get_big_objects(I_com,frame)

    cv2.imshow('fgmask', resize(I_com,0.2))

    if frame_id == 30:
        frame_2_save = resize(I_com).copy()
    #print(frame_id)
    k = cv2.waitKey(30) & 0xff
    if k == 27:
        break
    ret, frame = cap.read()

cap.release()
cv2.destroyAllWindows()
Finally we can view the result at step 30, as follows:
[7]:
%matplotlib inline
if you don’t have matplotlib installed, you can install it with pip. or just view the below cell, (if not ran interactively)
[8]:
import matplotlib.pyplot as plt
plt.imshow(frame_2_save)
[8]:
<matplotlib.image.AxesImage at 0x1e2821c4148>
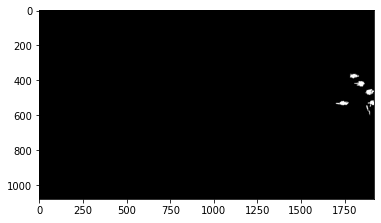
This final result shows much better output (although there is still some noise from the moving trees but it is smaller)